
I this article we will look at how we can create diskpart partition in windows Laptop or PC
You can follow same process for any version of windows like Home windows 11, windows 10, windows 7 and windows 8.
It is recommended to have separate drive for your personal data so it won’t be affected by windows program files. Let’s get started.
1. Shrink Existing C Drive :-
First we will shrink existing C drive for that let’s go to windows search bar & search for “Disk Management” & click on it, It will open another window. As you can see in screen-shot, we have only one C Drive

Now on vertical bar of Disk 0, Right click on “Windows (C):” , select “Shrink Volume” & click on it.

In the next pop window, it will show us available size to shrink in Megabytes. As you can see we have around 430GB of size available to shrink. We will go ahead & shrink around 300GB for our new diskpart partition, for “Enter the amount of space to shrink in MB” we will set 300000 MB & rest will be for our C drive which will be used by windows program files, now click on Shrink.

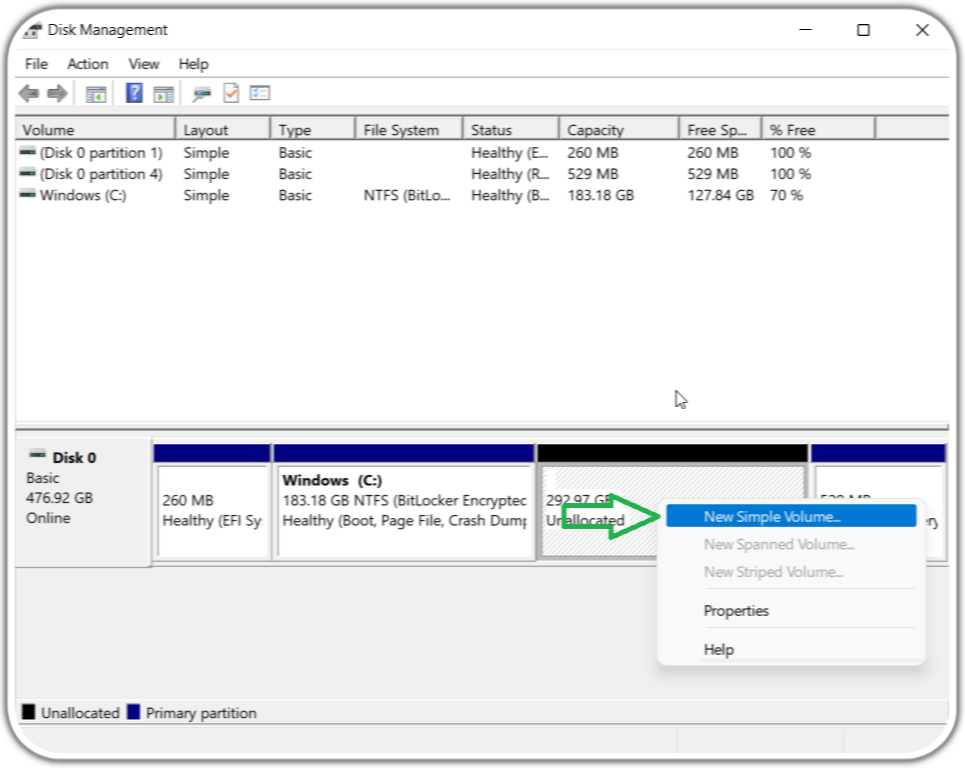
As you can see we have around 300GB unallocated space as given in screen-shot which we will assign to our new diskpart partition.

2. Create New Simple Volume :-
Now right click on unallocated window, select “New Simple Volume” & click on it.
In Welcome window, just click on Next.

In the next window we can set name of our new drive starting for A to Z using “Assign the following drive letter“. We am going to select D for our new drive & click on Next.

Now we have to set size of our new drive, as you can see in below screen-shot we have 300GB size available.
I am not sharing this laptop with my wife so I am going to create only one drive & assign to myself. In case if you are sharing laptop with your gf or wife you can have 2 new drive created, having separate drive for your gf or wife. I will set 300GB for my D Drive & click on Next.

In next window, we have options as given in screen-shot. let’s select “Format this volume with the following settings“, don’t make any changes to default setting. Just set label to new drive, I set it “D Drive” & Click on Next.

In the last windows we get completion message for our new drive along with few details & click on Finish.

Now our D drive is created as shown in below screen-shot.

3. Verify New Drive :-
Cheers !! We created our new Drive for our windows laptop or PC.

Hope this post will help you create new drive for your laptop.