
In this article, we will learn how to install anaconda python on Windows 64/32-bit. You can follow same process for any version of windows like Windows 11, Windows 10, Windows 7 and Windows 8.
Anaconda is a python and R distribution. It aims to provide everything you need (Python-wise) for data science and machine learning on a single machine.
It includes:
- The core Python language
- 100+ Python “packages” (libraries)
- Jupyter Notebook, Spyder, Orange
- conda, Anaconda’s own package manager, used for updating Anaconda and packages
We are going to use core python installer comes with Anaconda distribution & we will uninstall existing python from our system.
If you have existing python on system, you might get following warning message when you will try to use python of anaconda distribution.

To check existing python, go to windows command prompt (cmd) & run “python –version” command, if you see any python version in output of command as shown in below screen-shot, go to windows control center –> Programs –> Programs and Features –> Uninstall a program to uninstall exiting python.

After uninstallation of python, go back to windows command prompt (cmd) & run “python –version” command to verify it.
Now we will look at how you can download anaconda distribution from anaconda official website.
Anaconda(Python) Download
To download anaconda, go to google search & search for “anaconda python download“.
In first search result you will see official website of anaconda.
You can also use below link to go to official anaconda download link.
Official Download Link – Anaconda Python
On the above download page, you will see anaconda with latest version of python for windows 64-bit system.
To check additional installer like windows 32-bit, macOS, Linux, click on “Get additional installer” that link will redirect to bottom of the page.

Based on you windows 64-bit/32-bit, click on “64-Bit Graphical Installer/32-Bit Graphical Installer” link.
We have windows 64-bit so we will go click on “64-Bit Graphical Installer” which will start download for our anaconda installer exe file.
Download will take some time based on your internet bandwidth, please wait till download is completed.
Once download is completed, you should see anaconda installer exe file in your default download path.

Now we will look at Anaconda installation on Windows.
Install Anaconda(Python)
To Start installation process, double click on exe of Anaconda or right click on it & “Run as Administrator“. Please make sure your windows user has administrator access to install software on your system.

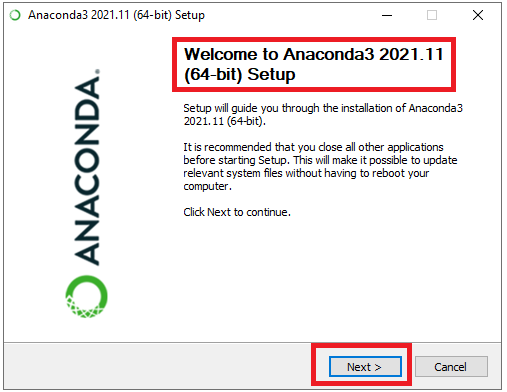
After confirming “do you want to allow this app to make changes to your device“, you will see Welcome Page for Anaconda installation, just click on NEXT.
In License Agreement page, click on “I Agree“.

In Select Installation Type page, you will have 2 options.
“Just Me(recommended)” & “All Users (require admin privileges)”, As per your need you can go with either of it.
I am going with “All Users (require admin privileges)” as i want to install it for all users though i have only one user on my system.

In Choose Install Location page, you can set location for your installation.
By default, it goes to C:\ProgramData\Anaconda3. You can click on Browse & change the location for setup as per your preference however I will go with default location. Now go ahead & click on NEXT.
Please make sure your selected location has more than 3GB available space.

In Advanced Installation Options page, you have following 2 Options.
(1) Add Anaconda3 to the system PATH environment variable
(2) Register Anaconda3 as the system Python 3.9
We will not enable first option as it is not recommended. We are also not going to need it.
We will enable second option as it will setup Python 3.9 as default system python & it can be used by any other python tools. Now go ahead & Click on Install.

Now your installation process should be started which will take some time based on your system configuration, please relax & wait till it is completed.
In Installation Complete page, you will see “Completed” message if you don’t run into any issue. Now click on NEXT.

Next page is just about promotion of 3rd part software, you don’t need to do anything. Go ahead & click on NEXT.
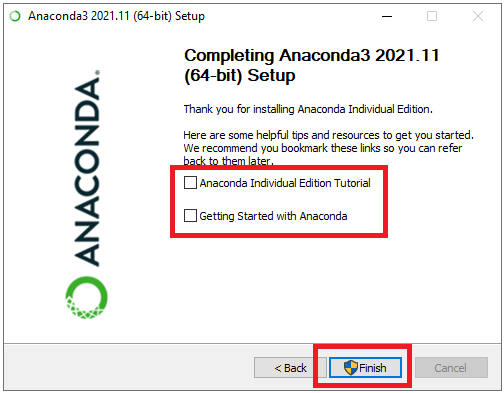
This is going to be last page for your Anaconda installation. Here you will have 2 following options.
(1) Anaconda Individual Edition Tutorial
(2) Getting Started with Anaconda
Just uncheck both the boxes & click on Finish to complete your setup.
Now let’s go to Windows Start Menu & look for Anaconda folder. Once you expand Anaconda folder you will see Anaconda Navigator, Anaconda PowerShell Prompt, Anaconda Prompt, Jupyter Notebook, Spyder inside it as shown in below screen-shot.

Now we will look at how to use Anaconda Navigator, Anaconda PowerShell Prompt, Anaconda Prompt, Jupyter Notebook, Spyder.
Anaconda Navigator:- It is a graphical user interface (GUI) included in Anaconda distribution that allows you to launch applications and easily manage conda packages, environments without using command-line commands.
You can launch Jupyter Notebook, Spyder applications using it.
To launch Anaconda Navigator, go to Windows Start Menu, look for Anaconda folder, expand Anaconda folder & click on Anaconda Navigator.
This may take some time based on your system configuration.

Anaconda Navigator home page will look like as shown below. You will see software icon having Launch/Install button.
The software which has Launch button are pre-installed with Anaconda distribution. The software which has Install button are need to be installed.
To open any software , just click on Launch button & it will be opened in new window.

How to use Jupyter Notebook
Jupyter Notebook:- It is part of the open-source Project Jupyter & it is completely free. It is part of the Anaconda data science toolkit too.
It is an incredibly powerful tool for interactively developing and presenting data science projects.
It’s a single document where you can run code, display the output, and also add charts, and make your work more understandable, repeatable, and shareable.
First, we will create new folder called “Jupyter Notebook” on our Desktop in which we will store our all notebook.
To launch Jupyter Notebook, go back to your Anaconda Navigator & click on Launch button given below Jupyter icon.

you will see a new tab opened in your default web browser that should look something like the following screenshot. This is the Notebook Dashboard, specifically designed for managing your Jupyter Notebooks.
Jupyter Notebook dashboard will be opened using URL https://localhost:8888/tree. It is not website but it is shared using your localhost machine.

Now lets let’s go to our folder “Jupyter Notebook” created on desktop, first click on desktop & than click on “Jupyter Notebook“, now we are inside our Jupyter Notebook folder.
Now, to create new notebook, click on “New” dropdown & select “Python 3” as shown in below screen-shot.
Blank notebook will be opened in new table of same browser as shown below.
![]()
First, we will rename notebook , for that click on “File” & select “Rename“.
We will change default name “Untitled” to “Sample” & Click on Rename. Our notebook is now saved as Sample.

Now let’s write simple python print statement “print(‘Jupyter Notebook’)” in our first cell of notebook.

To run it, click on “Run” button.
You will see the output of our print statement as shown in below screen-shot.

You can write your next statement in new cell as shown in below screen-shot. That’s how you can keep adding new cell along with code.

Now let’s check our notbook file, go to our folder “Jupyter Notebook” on our Desktop, here you can see Sample.ipynb file for our sample notebook.
.ipynb file is a text file that describes the contents of your notebook in a format called JSON. Each cell and its contents, including image attachments that have been converted into strings of text, is listed therein along with some metadata.

Now we will look at how to use Spyder IDE.
Spyder:- It is an open-source cross-platform IDE. The Python Spyder IDE is written completely in Python. It is widely used by data scientists, data analysts and data engineers. It is also known as the Scientific Python Development IDE.
First, we will create new folder called “Spyder” on our Desktop in which we will store our all python files created in Spyder IDE.
To launch Spyder, go back to your Anaconda Navigator & click on Launch button given below Spyder icon.

Spyder application will be opened with untitiled0.py file as shown in below screen-shot.
![]()
First, we will save our python program, for that go to File, select Save & set name of our python program to spyder.py
Now let’s write python print statement print(“Welcome to Spyder”) & save it.
To run this program, click on green run icon or you can use shortcut F5 too.

You will see output “Welcome to Spyder” in the right side window as shown in screen-shot.

Now we will look at how to use Anaconda Prompt ( command line).
Anaconda Prompt:- It is a library for prompting input on the command line for Python. It is pure Python code with no dependencies.
To launch Anaconda Prompt, go to Windows Start Menu & click on Anaconda Prompt as shown in below screen-shot.

First, let’s check python & pip version using Anaconda Prompt.
To check python version, run python –version command, you should able to see version of python as output of command.
Same way to check pip version, run pip –version, you will see version of pip as output of command.

You can also write python code in interactive mode using python command.
Just type python & press Enter key. Now you can write your python print statement as shown in screen-shot. Press enter key to see output of your print statement.

You can also launch Jupyter Notebook using Anaconda Prompt.
Type Jupyter Notebook & press Enter which will open Jupyter Notebook in your default browser.

Same way you can launch Spyder using Anaconda Prompt.
Type Spyder & press Enter which will open Spyder in new Window.

You can use Anaconda Prompt to install python module using pip install command.
As shown in screen-shot, we have installed PyPDF2 module using “pip install PyPDF2” command.

Same way you get list of installed python module using pip list command as shown in below screen-shot.
You can also run your python script using python command.
We ran spyder.py script using python “C:\Users\Desktop\Spyder\spyder.py” as shown in screen-shot.
Please make sure you give full path of script or go to script directory & run from there.

That’s All. Hope this article helped to install Anaconda on your system & gave some idea about how to use Jupyter Notebook, Spyder & Anaconda Prompt.
Please don’t forget to leave your feedback in below comments section!!