
In this article we will learn how to download & install Oracle SQL Developer on Windows 10 64-bit/ 32-bit. You can follow same process for any version of windows like windows 11, windows 10, windows 7 and windows 8.
SQL Developer provides powerful editors for working with SQL, PL/SQL. With SQL Developer We can run queries, generate execution plans, export data to the desired format (XML, Excel, HTML, PDF, etc.), execute, debug, test and much more with SQL Developer.
Java Development Kit (JDK) is prerequisite for SQL developer, so first we will look at JDK Installation. If you already have latest version of JDK installed on your system then you can skip this step.
Install Java Development Kit (JDK) on Windows 10: –
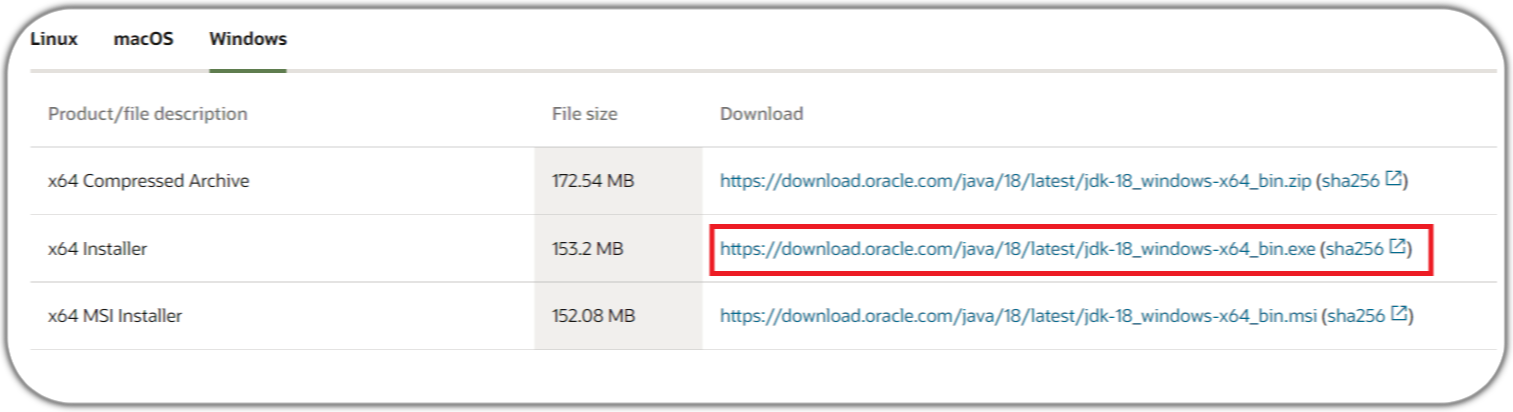
Download JDK from Oracle website or you can use below direct download link.
Direct Download Link – Download JDK – Oracle
Once JDK is downloaded then right click on .exe file and select “run as administrator” option to start installation.
On welcome screen of JDK installer, just press “Next“.

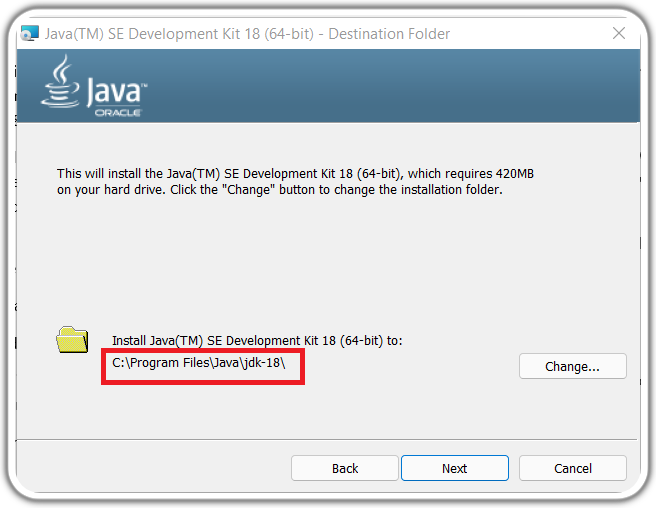
In Next windows, you can set installation path for JDK by default it will install inside “C:\Program Files\Java\jdk-18“. Please don’t make any changes to path & install in default path(recommended). Let’s click on NEXT.
Now you will see installation progress which me take few seconds to complete. On JDK successfully installed page click on Close. Now jdk is installed on your system.

SQL Developer Download
You can search for “sql developer download in Google to go to download link of SQL Developer or you can use below direct download link.
Direct Download Link – Oracle SQL Developer
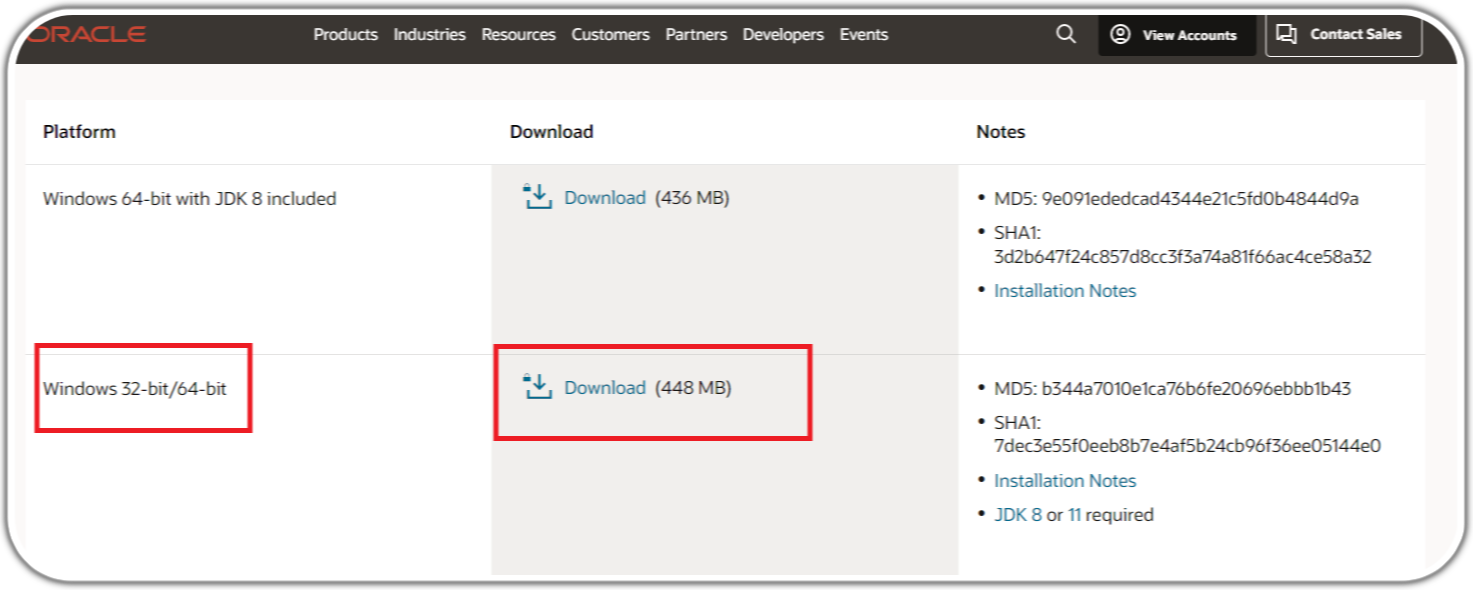
On the download screen, you will see 2 version for Windows, First one is with JDK 8 for 64 bit & second is for both 32/64 bit, Please download either of it as per your need. In my case I will go with 2nd.
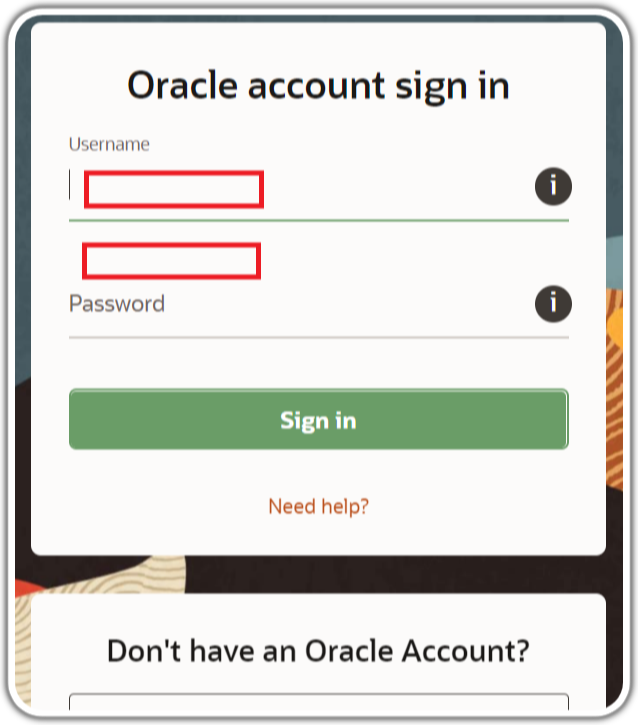
Once you click on Download it will pop new window for agreement, click on checkbox to accept Oracle License Agreement.
It will display another login page for Oracle account. I have already created my oracle account so I will login with my account details. After successfully login, it will start download automatically.
If you don’t have oracle account, don’t worry. Its free & you can create it by just providing your email id & some personal details.
After download completion, you will see sqldeveloper-xxxxx zip file in your default download directory.
Install SQL Developer
For oracle sql developer best part is that you don’t need to install it, Just unzip downloaded file & copy to any preferred location, I will copy unzip file to my C Drive as shown in screen-shot.

To run SQL developer just double click on sqldeveloper.exe or “run as administrator“.
In few cases it may popup below windows to set path of Java JDK, please set the path of JDK which we use in JDK installation as shown below & click on OK.

As you can see, our Oracle SQL developer is being opened which will take sometime based on your system configuration.

Now we will look at 2 ways to connect to oracle database using SQL developer.
Using tnsnames.ora File in SQL Developer
tnsnames.ora is a Oracle Network Manager configuration file that describes databases and how to connect to them. The file contains the connection name, protocol, address, network port, and instance name.
When you launch sql developer, on the home page you will see “Databases Detected” if you have oracle database install on your system, please check out below link if you want to install oracle database on your local machine.
How to Install Oracle 11g on Windows 10

If you don’t see TNS file, don’t worry in second method we will look at how to create it without tnsname.ora file
Now click on hyperlink XE. It will popup login window ( remove default username ). Please enter your username & password for oracle database, I am going to use SYSTEM username & my password as shown in screen-shot. Click on OK to connect to database.

As you can see we are connect to our local database XE using server side tnsnames.ora file
You can write your test sql in SQL worksheet & run it using Green Icon as below.

Using Manually Created Connection
To create new connection right click on “Oracle Connections” or click on + green icon to create new connection.

In the next windows please fill all details as given in screen-shot. Please test connection before saving it.

- Name – Its name for your connection, set any name as per your preference – XELocal
- Database Type – Oracle(default)
- Authentication Type – Default
- Username – Your oracle database username – SYSTEM
- Password – Your oracle database password
- Connection Type – Basic
- Hostname – Name or IP of oracle database – localhost
- Port – Port of oracle database – default port 1521
- SID – sid of oracle database – XE
You can also use Connection Type as TNS if it is set by your admin team on your system as shown in below screen-shot. ( i am using TNS which is created by oracle 11g server Installation on my laptop)

Now right click on created connection (XELocal) to connect to it.

Once you connected to your database, You can write your test sql in SQL worksheet & run it using Green Icon as below.

That’s All. Hope this article helps to install oracle SQL Developer on your system & connect to oracle database using it.
Please don’t forget to leave your feedback in below comments section!!